How to Hang a Picture: The Complete Step-by-Step Guide
Learning how to hang a picture correctly is one of the simplest yet most effective ways to improve the appearance of your home. Whether you are decorating a new house, refreshing a room, or displaying cherished memories, properly hung artwork can transform an ordinary wall into an attractive focal point. While hanging a picture may seem like a straightforward task, how to hang a picture achieving professional-looking results requires careful planning, the right tools, and an understanding of proper placement techniques.
Many homeowners make common mistakes when hanging pictures. Frames may end up crooked, positioned too high or too low, or secured with hardware that cannot support their weight. These issues not only affect the appearance of the room but can also damage walls and artwork. Fortunately, learning how to hang a picture properly is a skill that anyone can master with a little preparation and attention to detail.
This comprehensive guide covers everything you need to know about how to hang a picture, including choosing the right location, selecting appropriate hardware, measuring accurately, working with different wall types, and ensuring your artwork remains secure for years to come.
Why Proper Picture Hanging Matters
The placement of artwork plays a major role in interior design. A well-positioned picture can balance a room, create visual interest, and enhance the overall atmosphere. On the other hand, poorly placed artwork can make a room feel awkward or unfinished.
Professional interior designers often emphasize that artwork should complement furniture and architectural features rather than compete with them. The height, spacing, and alignment of pictures significantly influence how a room feels. Proper picture hanging ensures that artwork becomes an integrated part of the room’s design rather than an afterthought.
In addition to aesthetics, correct installation improves safety. Heavy frames that are improperly secured may fall and cause damage or injury. Using suitable hardware and installation techniques helps protect both your artwork and your home.
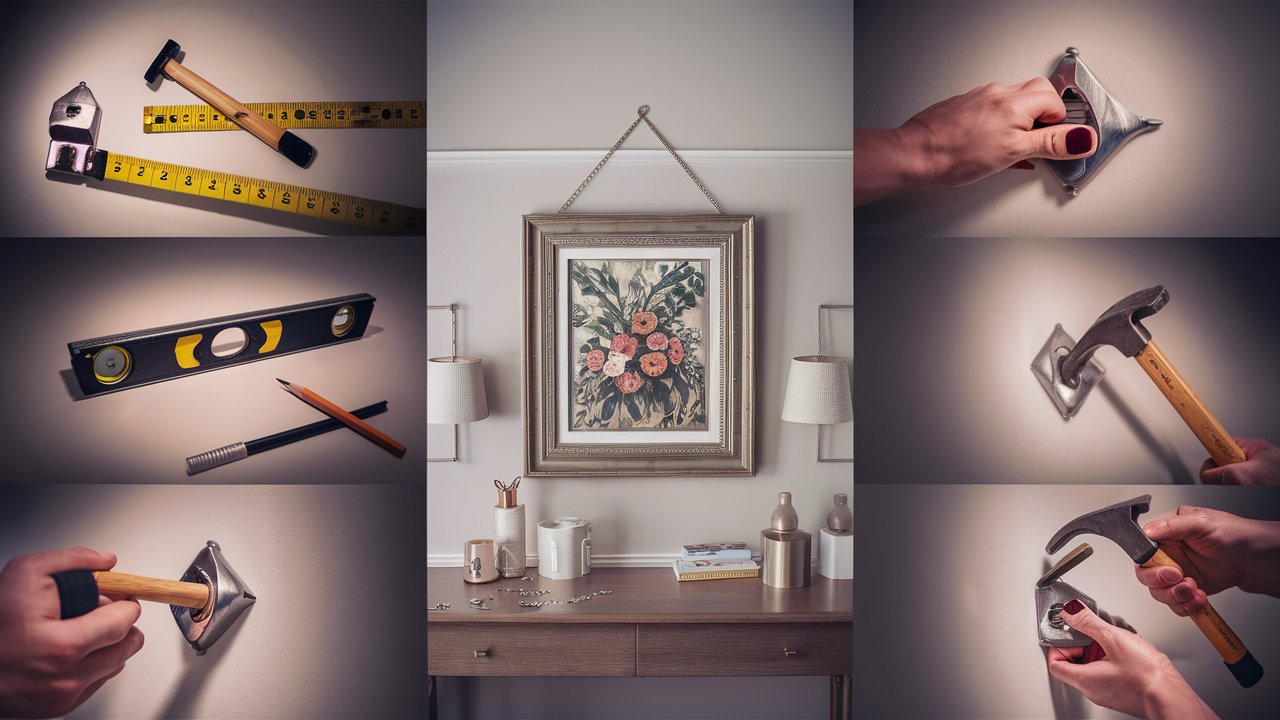
Essential Tools for Hanging a Picture
Before beginning your project, gather the necessary tools. Having everything ready will make the process faster and more accurate.
Common tools include:
- Measuring tape
- Pencil
- Level
- Hammer
- Picture hooks
- Nails
- Wall anchors
- Screwdriver
- Stud finder
- Drill (for heavier items)
These tools help ensure precise measurements and secure installation. Investing in quality tools can make future decorating projects much easier.
Choosing the Perfect Location
Selecting the right location is one of the most important steps when learning how to hang a picture. The ideal placement depends on the size of the artwork, the dimensions of the room, and the surrounding furniture.
A general rule used by interior designers is to hang artwork so that the center of the picture sits approximately 57 to 60 inches from the floor. This measurement corresponds closely to average eye level, making artwork comfortable to view.
When hanging a picture above furniture such as a sofa, bed, or console table, leave approximately six to twelve inches of space between the furniture and the bottom of the frame. This creates a visual connection between the artwork and the furniture while preventing the picture from appearing disconnected from the room.
Consider lighting as well. Natural and artificial light can enhance artwork, but excessive direct sunlight may cause fading over time.
Measuring Before Hanging
Accurate measurements are essential for professional-looking results. Start by measuring the height and width of the frame. Determine the hanging point by measuring the distance between the top of the frame and the hanging hardware on the back.
Mark the desired center point on the wall using a pencil. Calculate the correct nail or hook position based on the frame measurements and hanging wire placement.
Double-check all measurements before making any holes in the wall. Taking a few extra minutes to verify placement can prevent unnecessary repairs later.
Many homeowners find it helpful to create a paper template matching the dimensions of the frame. Taping the template to the wall allows you to visualize the placement before installation.
How to Hang a Picture on Drywall
Drywall is one of the most common wall materials in modern homes. Lightweight pictures can usually be hung using standard picture hooks or nails.
For heavier artwork, wall anchors provide additional support. Anchors distribute weight more evenly and reduce the risk of damage to the drywall.
If the picture is particularly heavy, locate a wall stud using a stud finder. Installing screws directly into studs provides maximum stability and security.
Always check the weight rating of any hardware you use. Selecting hardware designed for the specific weight of your frame is crucial for safe installation.
How to Hang a Picture on Brick or Concrete Walls
Brick and concrete walls require different installation methods than drywall. Standard nails will not work effectively in these materials.
Instead, use masonry screws or wall plugs specifically designed for brick and concrete surfaces. A power drill equipped with a masonry bit is typically necessary to create pilot holes.
Although the installation process is more involved, masonry fasteners provide exceptional strength and stability. This makes them ideal for supporting heavier artwork and decorative items.
Careful measurement remains essential because adjustments are more difficult once holes have been drilled into masonry surfaces.
Keeping Pictures Straight
One of the most common frustrations homeowners encounter is artwork that gradually shifts out of alignment. Fortunately, there are several ways to keep pictures straight.
Using a level during installation helps ensure initial alignment. Adhesive bumpers placed on the lower corners of the frame can reduce movement and prevent wall marks.
For gallery walls or multiple-picture arrangements, measure spacing carefully and use alignment guides to maintain consistency. Symmetrical spacing creates a clean and organized appearance.
Regularly checking frames and adjusting them as needed helps maintain a polished look over time.
Creating a Gallery Wall
Gallery walls have become increasingly popular in modern interior design. They allow homeowners to display multiple pieces of artwork, photographs, and decorative items in a cohesive arrangement.
Start by laying out the arrangement on the floor before hanging anything. This allows you to experiment with different configurations and spacing.
Maintain consistent gaps between frames, typically two to four inches apart. Begin installation with the center piece and work outward to maintain balance.
A well-designed gallery wall can become a striking focal point that reflects your personality and style.
Common Picture Hanging Mistakes
Many people make avoidable mistakes when hanging pictures. One of the most common errors is placing artwork too high on the wall. This can make the room feel disconnected and uncomfortable.
Another mistake is using hardware that is too weak for the frame’s weight. Always verify weight ratings before installation.
Ignoring scale is another issue. Small artwork can appear lost on large walls, while oversized pieces may overwhelm smaller spaces.
Rushing measurements often leads to uneven placement. Taking time to plan and measure carefully results in a more professional appearance.
Professional Picture Hanging Tips
Interior designers often recommend treating artwork as part of the room’s overall design rather than a standalone decoration. Consider the relationship between artwork, furniture, lighting, and architectural features.
Use larger artwork in spacious rooms and smaller pieces in compact areas. Coordinate frame styles with the room’s design theme for a cohesive appearance.
Experiment with arrangements before making permanent holes. Temporary adhesive strips or paper templates can help visualize the final result.
Most importantly, choose artwork that reflects your personal taste and complements your living space.
Conclusion
Learning how to hang a picture correctly is a valuable skill that can dramatically improve your home’s appearance. By selecting the right location, using proper tools, measuring carefully, and choosing appropriate hardware, you can achieve professional-quality results that enhance any room.
Whether you are hanging a single family photograph, a large statement piece, or creating an elaborate gallery wall, the principles remain the same: plan carefully, measure accurately, and install securely. Taking the time to do the job properly ensures that your artwork looks beautiful, remains safe, and contributes positively to your home’s overall design.
With the techniques and tips outlined in this guide, you can confidently hang pictures on virtually any wall type and create attractive displays that showcase your style and personality.
Frequently Asked Questions (FAQ)
What is the standard height for hanging a picture?
Most designers recommend placing the center of the picture approximately 57 to 60 inches from the floor.
How do I hang a heavy picture safely?
Use wall anchors or install screws directly into wall studs for maximum support.
Can I hang pictures without nails?
Yes. Adhesive picture-hanging strips are available for lightweight frames and temporary displays.
How far above furniture should a picture be hung?
Generally, leave six to twelve inches of space between the furniture and the bottom of the frame.
How do I keep a picture from becoming crooked?
Use a level during installation and place adhesive bumpers behind the frame to reduce movement.
What tools do I need to hang a picture?
Basic tools include a measuring tape, level, hammer, pencil, picture hooks, and appropriate wall anchors.
Can I hang pictures on brick walls?
Yes. Use masonry screws, wall plugs, and a drill with a masonry bit for secure installation.
How much weight can drywall support?
The amount depends on the hardware used. Standard drywall anchors can support varying weights, so always check manufacturer specifications.